Follow the steps below to set up your health monitoring device and connect it to your smartphone.
These steps are important to allow you to automatically send readings from your device to your phone. They will also help you share your health data with the NYU Langone Health app.
Note: These example steps use an iPhone and a blood pressure monitor from Withings. Depending on the type of health monitoring device you have, as well as the company that makes it, there may be some small differences to these general instructions.
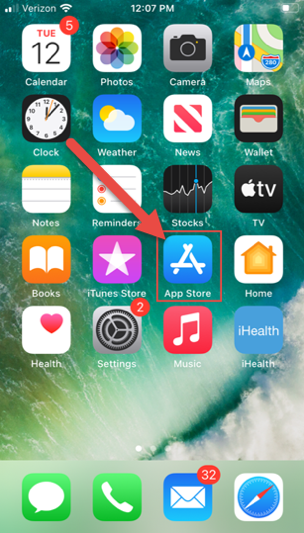
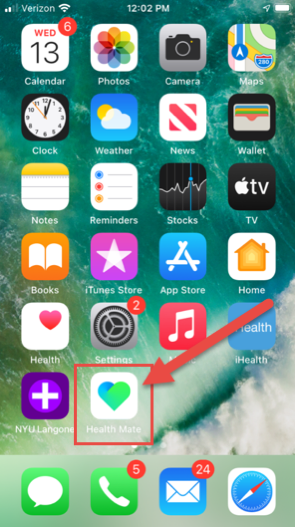
1. From the home screen of your smartphone, select the App Store.
If you are using an Android smartphone, select the Play Store.
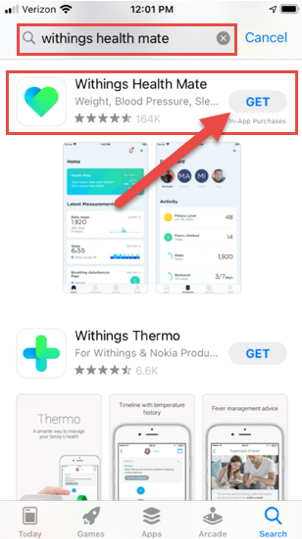
2. Use the Search feature to search for the app for your device. In this example, we are using a Withings blood pressure monitor, so we need to search for the Withings Health Mate app.
Note: If you use a health monitoring device from a different company, please refer to those instructions to see which app you need to download.
3. Locate the app in the search results. Select GET or the download icon to download the app to your smartphone.
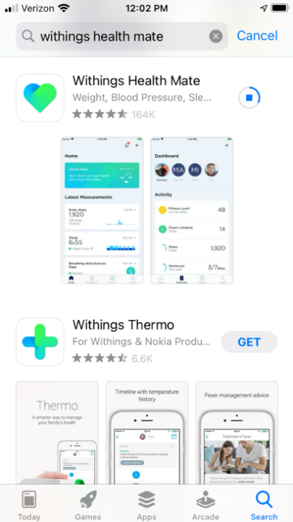
4. The Withings Health Mate app will install on your smartphone.
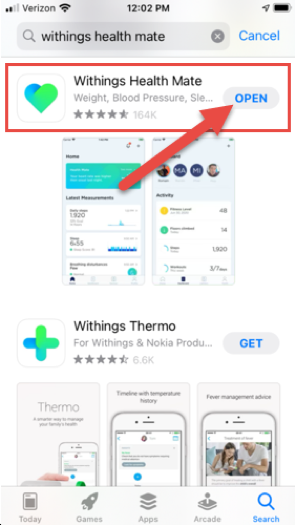
You can then open this app by selecting OPEN. Or you can open it by returning to the home screen of your smartphone and selecting the newly downloaded app.
This section shows you how to set up the app for your device and share data with Apple Health (or Google Fit for Android).
This is important because Apple Health (or Google Fit) is how the app for your device connects to your NYU Langone Health app.
1. Select the app for your device to open it.
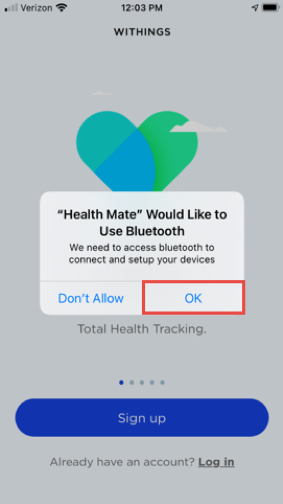
2. When the app opens, you will be prompted to allow it to access the Bluetooth on your smartphone. Select OK.
(Make sure Bluetooth is enabled on your smartphone.)
Reminder: In this example, we are using the Withings Health Mate app. There may be small differences with other apps.
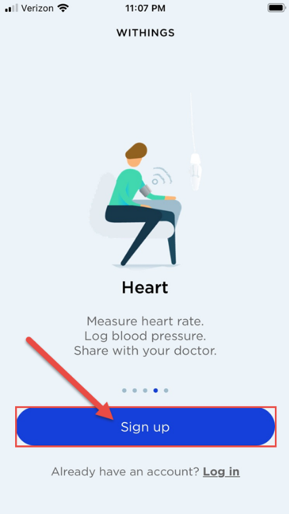
3. You will then be on the sign-up page for the app. Select Sign up.
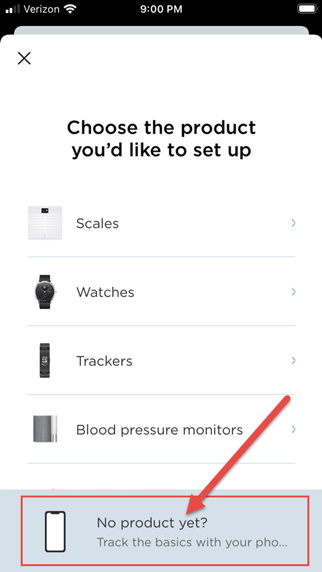
4. You can then choose the type of health monitoring device you need to set up. You can also choose to continue without a product.
If you do not yet have an account with Withings, select the No product yet? option at the bottom of the screen. This brings you to your account setup.
Note: We will show you how to add devices after setting up an account.
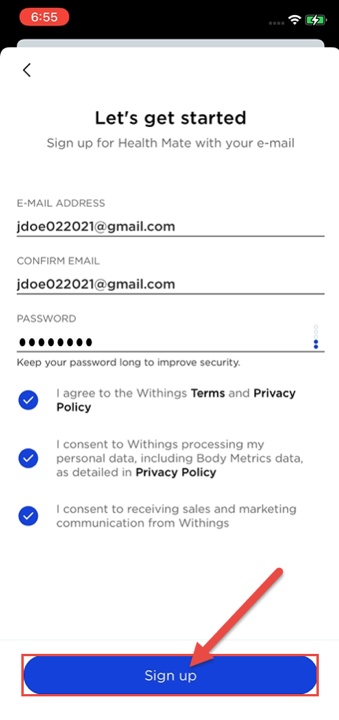
5. You will need to create an account and log into the app. Fill in the fields (email address, confirm email, and password). Then select Sign up.
Follow the additional instructions on the screen to fill in your profile.
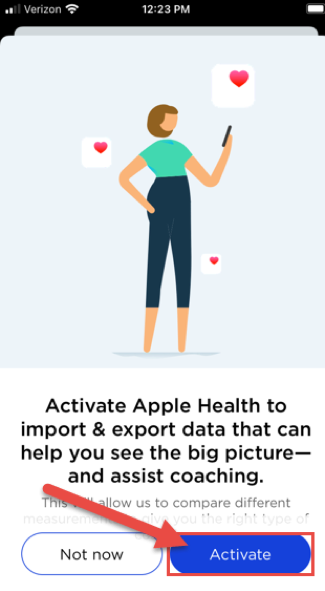
6. After you complete setting up an account, the app will now prompt you to activate Apple Health. Select Activate.
If you are using an Android phone, you will need to activate Google Fit.
7. Select Next to continue.
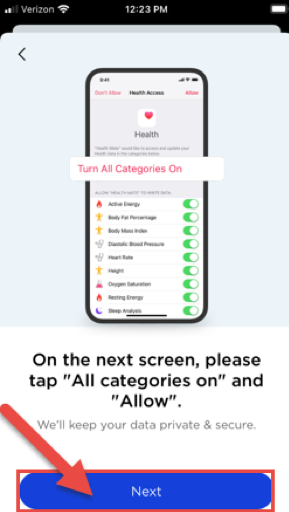
8. Here you will see different data categories for remote health monitoring display.
You can choose to turn all categories on. Or you can choose certain categories to share with Apple Health.
Select Turn All Categories On.
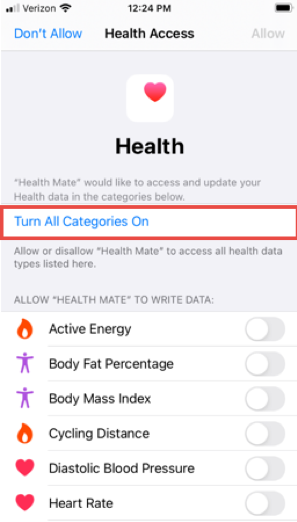
9. Make sure you see the buttons (toggles) switched on under both the Allow "Health Mate" to Write Data section and the Allow "Health Mate" to Read Data section.
It is important that both the "write" and "read" sections are turned on. This allows Apple Health to later share your health data with the NYU Langone Health app.

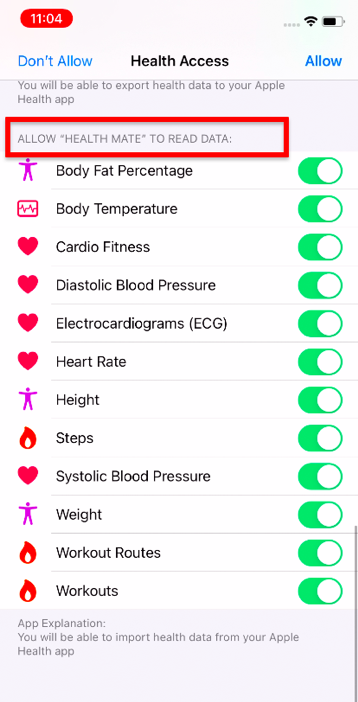
10. Select Allow from the top right corner of the screen.

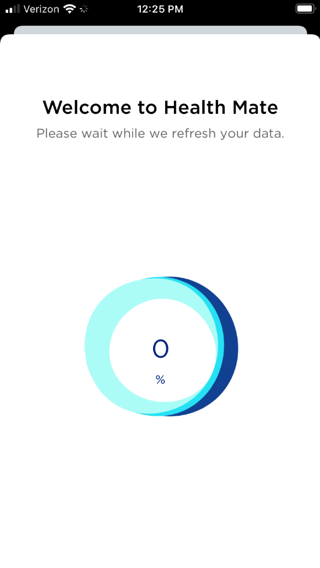
11. After you have synced your device app with Apple Health (or Google Fit for Android), you will go back to the device app.
Now the app will refresh.
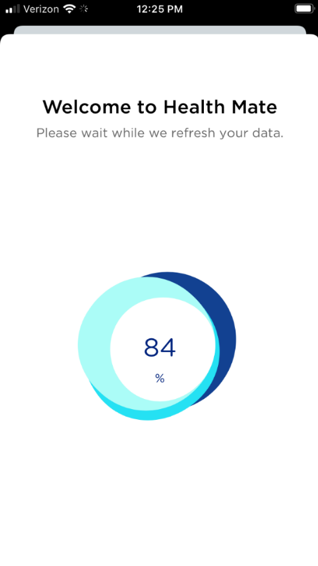
12. After the refresh is completed, you will see the home screen of the app. You may see a prompt to choose your notification preferences.

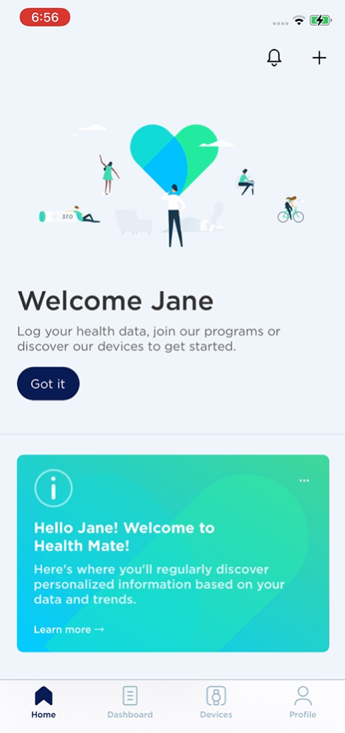
13. You are now at the home screen of the app.
In the previous section, we skipped adding a device from the sign-up screen. We did this so you could first set up your account with the device app and turn on Apple Health (or Google Fit).
Next, we will cover how to pair your health monitoring device to your smartphone. This will allow you to automatically send readings from your device to the device app on your phone.
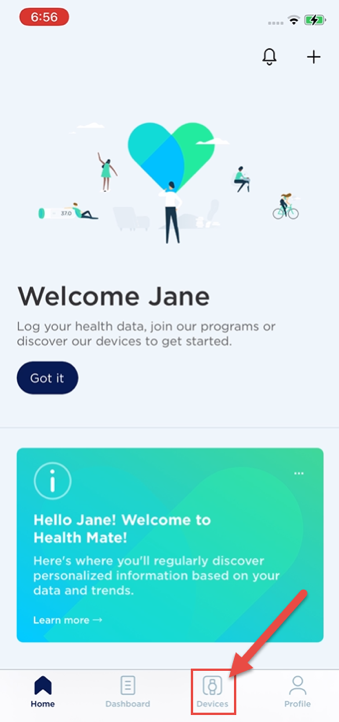
1. From the home screen of the device app, select Devices.
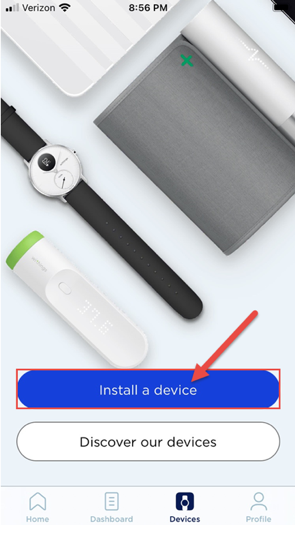
2. Select Install a device.
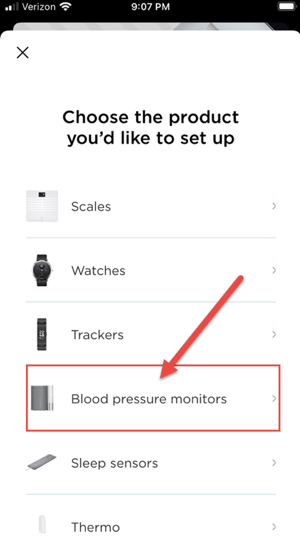
3. In this example, we will be setting up a blood pressure monitor. Select Blood pressure monitors.
Note: Now the remaining steps are the same as they would have been if you had tried to set up the device at sign-up.
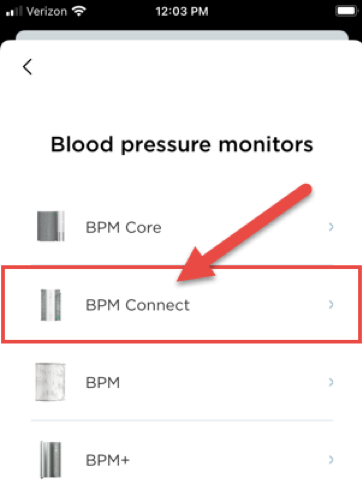
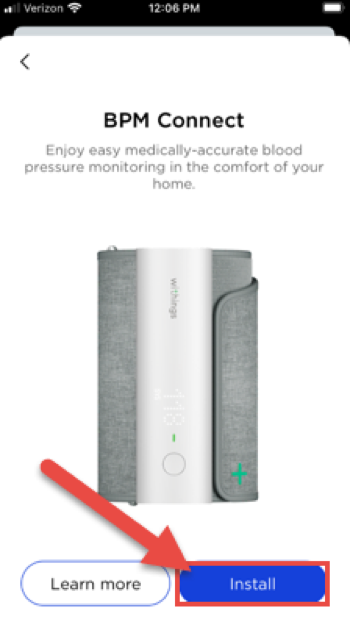
4. Select the type of blood pressure monitor you have. For this example, we are using the "BPM Connect" model of the device. Select BPM Connect.
5. The app provides an image of the device model. Select Install.
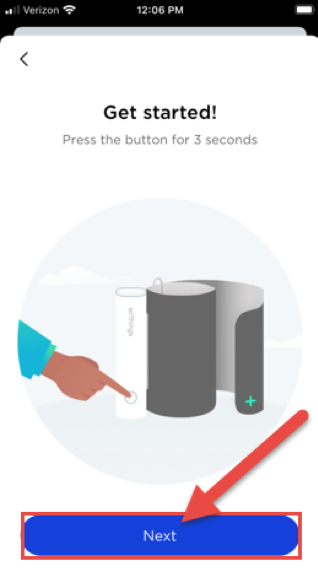
6. Select Next to allow your smartphone to search for the nearby blood pressure monitor via Bluetooth.
Note: You will also need to allow your device to pair as you would with a set of wireless headphones.
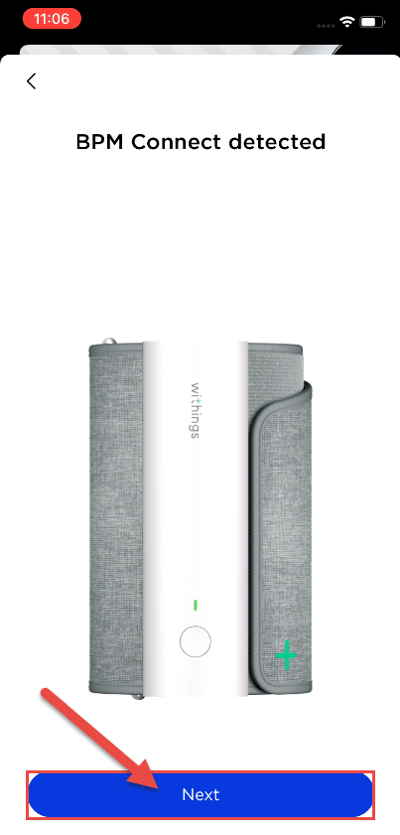
7. Your smartphone will now search for the blood pressure monitor to sync.

8. Once detected, the app will display the device it has located. Select Next.
9. Select Pair.
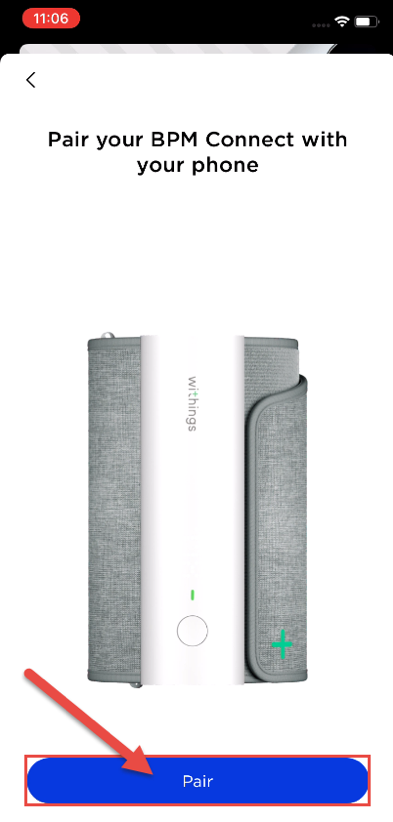
10. Select Pair again to confirm you would like to continue.

11. The health monitoring device is now connected to your app. Select Next now.
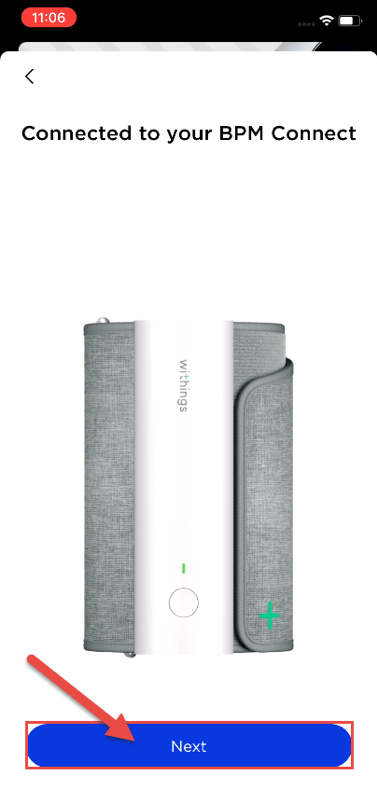
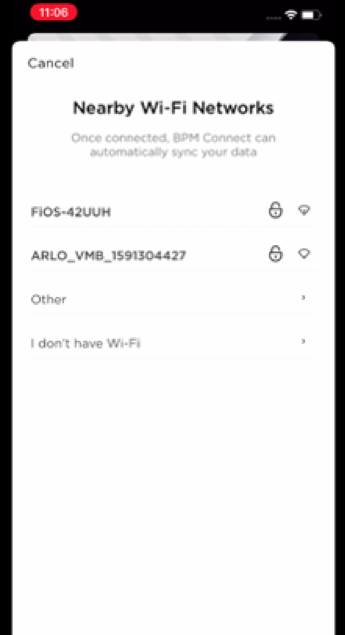
12. Select the Wifi network that your device should connect to. Then enter the password for your Wifi network.
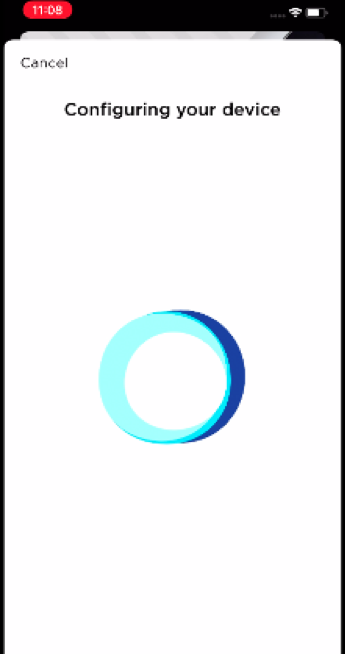
13. Once the device is connected to Wifi, the app configures the device. The app may also look for and download the latest updates to the device.
14. The app will show that your device has successfully connected to your smartphone.
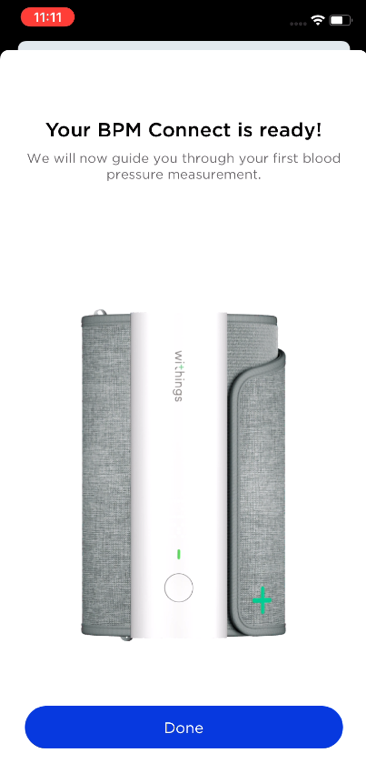
15. You can now use your device to take blood pressure readings.
Readings from the device automatically sync to the device app and to Apple Health (or Google Fit) on your smartphone.
© NYU Langone Health. All rights reserved. Reviewed for health literacy. This information is not intended as a substitute for professional medical care. Always follow your health care provider's instructions.